Welcome back to our informative series on Excel by Steve Hughes! In his first post, he conquered the Quick Explore feature. In this post, Steve will delve into the Show Explore feature. Join Steve as he shows you how you can drill into details using the Show Explore feature once you've connected your SSAS cube to Excel.
Show Details
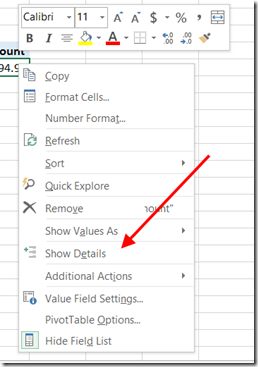
So, you have connected Excel to your SSAS cube. You really wish you could easily drill to details using Excel. You can do this in Excel 2013 by double clicking the cell or right clicking the cell to get the shortcut menu which includes the option as well.

It is really cool that you can just double-click the cell and get there directly. By default, it returns the first thousand rows of detail from the underlying cube data.

You can change this in the connection options for your SSAS connection.

One “gotcha” on this is that It doesn’t work on a calculated cell, but it works fine on standard measures. If you use a lot of calculated members, you will get the error in both cases. So if this option is important for the users of a specific calculation, you may need to get it into cube as a standard, not calculated, measure.
Have questions about Excel? Submit your questions in the section below and Steve will be more than happy to answer them!
Don't forget to check out the Pragmatic Works' on-demand learning platform for more insightful content and training sessions on Power BI, Power Apps, Power Automate, Copilot Studio, Fabric, Azure and other Microsoft applications. Be sure to subscribe to the Pragmatic Works YouTube channel to stay up-to-date on the latest tips and tricks, along with fresh content every week.
It's also incredibly easy to get started with your 7-day free trial. No credit card required. Just click below and you'll be on your way.


-1.png)
Leave a comment