In my last blog post, you learned how easy it is to quickly create your first app. In this follow-up blog I want to show you how you can make some basic customizations to the app that was created in the previous post.
You can find my previous blog here:
What’s covered
In this post we are going to quickly cover the following customizations:
- Renaming
- Currency Formatting
- Default properties

In this first image we can see that the name of the title on the screen has an underscore instead of a space. Secondly, we see that the default value of the expense amount is not consistent. We are going to quickly update each of these items.
Renaming controls:
- First, select the title. This can be done by either clicking the title directly or by finding the text input control from the left navigation bar.
- Secondly, select text from the drop down list of properties on the control selected, this may be the default property.
- Finally, update the text value in the formula bar. Replace the underscore with a space.

Customizing currency formatting
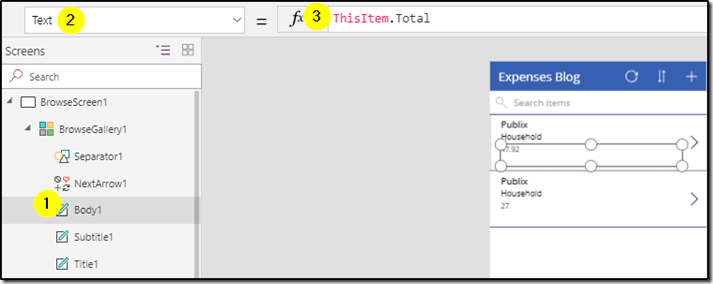
Now we are going to update the currency formatting. To update formatting we are going to use the Text function and we will once again be working in the formula bar.
- Select the control currently displaying the expense amount. Once again, you can select this control directly from the app or select the control from the Left Navigation bar.
- Make sure Text is selected from the drop down properties box, this should be the default selection.
- Update the formula bar to format the output text, see code below image.

The formula is Text(ThisItem.Total, “$#,###.00”), see image below:

Setting Default Values
The final customization we will make is to set default values, this will make working and interacting with the app a much better experience. For example, the date will always default to the current date when adding new expenses.
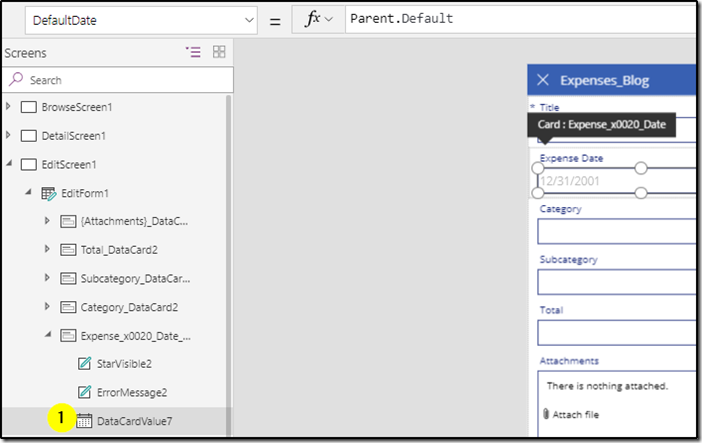
I’m going navigate to appropriate screen by selecting the EditScreen1 from the Left Navigation bar, this will take me to the edit screen where we can edit existing records or create new records. This behavior of being able to edit or create new records is done through the Edit Form control. The form control is slightly unique because the controls inside the edit form are stored in cards and those cards are Locked! Let’s unlock the card so we can customize it:
- First, select the card control from the Left Navigation bar.

- Next, navigate to the properties window found on the right side of the screen and select Advanced, in the advanced properties click Unlock to change properties. This will now unlock the card so that we can edit the controls.

- Next, select the date picker control.

- Finally, update the formula for DefaultDate to simply Now(). As you can see in the screenshot below, the date of the date picker control will now default to the current date whenever a new record is being added in the app!

As always, thanks for reading my blog.


-1.png)
Leave a comment