Welcome back to our blog series Excel at Excel with Steve Hughes! In his previous posts, he's discussed using the Quick Explore, Show Details and Flash Fill features. In this entry, Steve will show you how to add a Slicer feature in Excel.
Adding a Slicer
Slicers are not new functionality in Excel as they were in Excel 2010 as well. However, they are even more highlighted in Excel 2013. You can add a Slicer from the INSERT tab on the ribbon in Excel as shown in the image below:

When you click this button, you get a data source dialog. It will show you the available connections in your workbook as well as other connections you have used or are available. Now in my case, I am using a PowerPivot data source. In order to use that, you need to create your slicer from the PivotTable tools as shown below by right-clicking the field to use as a Slicer.

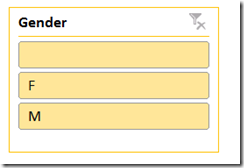
Once you click this, it will create a Slicer on the sheet you are working in with all of the available, unique values from the field.

Connecting Your Slicers to Data
Now you have created your first Slicer. However, I would be cruel not to wrap this up by showing you how to connect your Slicer to related data objects in Excel.
There are two ways to get to the Report Connections option. First, in the shortcut menu (right-click) on the Slicer you will get the option in that menu as noted below.

The second way is to bring focus to the Slicer and you will get a new menu option on the ribbon called Slicer Tools – Options. The Report Connections button there will lead you to the same dialog to relate object.

You can also get to the shortcut menu from the target data object such as a PivotTable.
The Report Connections dialog allows you to relate the slicer to data objects from the same data source. It will display objects from all of the objects within your workbook. This means that you can have Slicers filter data across multiple sheets. How cool!

In the next edition, I will talk about a new setting which I believe makes slicers even more user-friendly and usable to create a dashboard in Excel.


-1.png)
Leave a comment